 Michael Thompson
Key Takeaways
- Clean the lint filter every load and wash it monthly, because dryer sheets leave a film that blocks air even when the screen looks clean.
- Wipe the moisture sensor bars monthly with rubbing alcohol; a coated sensor is what the HS code reports.
- Check the drum for loose objects and the felt seals for wear.
- Clean the vent at least once a year, with rigid or semi-rigid metal duct and a free-moving outside flap.
- A d80, d90 or d95 code is the dryer warning you about a blocked duct.
The Bottom Line
Lint every load, filter and sensor bars monthly, vent yearly. If clothes are still damp or a code returns after cleaning, book a diagnosis; the price is confirmed after it, with a written estimate before work begins.
Most of what goes wrong with a dryer, from long cycles to heat codes to the occasional fire, comes back to lint and residue in four places: the lint filter, the moisture sensor bars, the drum and the vent. Here is how to clean an LG dryer in the order that does the most good, with how often to do each step and what to watch for when you do. Our LG dryer maintenance guide sets out the overall schedule; this one is the hands-on routine.
| What to clean | How often | With what |
|---|---|---|
| Lint filter | Every load | Your fingers; wash it monthly |
| Lint filter film | Monthly | Warm soapy water and a soft brush |
| Moisture sensor bars | Monthly | Rubbing alcohol and a soft cloth |
| Drum and seals | Occasionally | A damp cloth, with a look at the felt strips |
| Exhaust duct and vent hood | At least once a year | A professional cleaning, or the right brush |
How Often Should You Clean the Lint Filter?
Every load, and once a month with water. Pulling the lint off the screen before or after every load is the most important cleaning job on a dryer, because a clogged filter restricts airflow, lengthens drying times and creates a fire hazard. The monthly wash deals with something you cannot see: dryer sheets leave a waxy film on the mesh that blocks air even when the screen looks clean.
- Pull the filter and peel off the lint. Do it before you load, not after the cycle has cooled.
- Wash it monthly. Warm soapy water and a soft brush.
- Dry it fully. A wet mesh clogs faster and can read as missing on the filter check.
- Seat it fully. The F0 page says a filter that is missing or not seated will stop the cycle.
How Do You Clean the Moisture Sensor Bars?
With rubbing alcohol on a soft cloth, once a month. The two metal strips inside the drum near the lint trap tell the dryer when clothes are dry, and the film from dryer sheets and fabric softener coats them and blinds them. A coated sensor ends auto cycles too early or runs them too long, which is what the HS code reports.
- Unplug the dryer. Then open the door and find the bars.
- Wipe each bar firmly. The cloth will usually come away dirty, which is the film.
- Let them dry. A few minutes, then run a short cycle.
- Cut back on sheets and liquid softener. They are the main source of the film.
What Should You Check in the Drum?
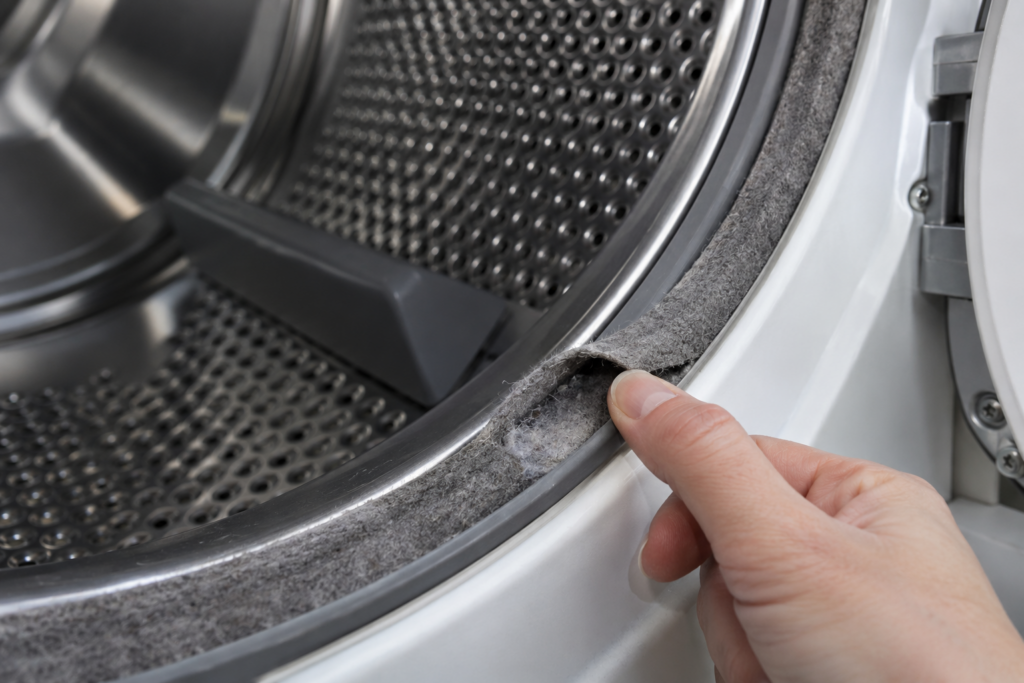
Look for loose objects and for wear on the seals. Coins, pins and buttons can damage the drum and the filter housing, and the felt strips at the drum edges keep lint from slipping past the filter. If the seals are worn, lint collects in the cabinet, and black marks on clothes can be a sign that they need attention.
- Empty and wipe the drum. A damp cloth removes dye and residue.
- Look at the seals. Frayed or flattened felt lets lint through.
- Check the pockets of clothing first. It saves the drum more than any cleaner can.
How Do You Clean the Dryer Vent?
At least once a year, and more often with heavy use, and it is the one cleaning job that is better done by a professional if you cannot reach the whole run. The duct carries lint from the dryer to the outside of the house, and it is the main fire hazard. The signs it needs cleaning are clothes that take longer to dry, a dryer that runs hot to the touch, a burning smell and an exterior flap that does not open while the dryer runs.
LG dryers add a warning of their own. The d80, d90 and d95 codes are the dryer's flow-sensing alert for a partly blocked duct, and the d80 page says to clean the duct before regular use. Use rigid or semi-rigid metal duct, never plastic or foil accordion duct, and keep the dryer far enough from the wall that the duct is not crushed.
What Not to Use
Cleaning a dryer is a case where gentle beats strong. The parts that matter, the mesh, the sensor bars and the seals, are easily damaged, and a few common habits do more harm than the lint they remove.
- Do not run the dryer without the filter. Lint reaches the heater and the duct, and the F0 page treats a missing filter as a fire risk.
- Do not use steel wool or abrasive pads on the sensor bars. Alcohol and a soft cloth are enough.
- Do not spray water or cleaner inside the cabinet. The electronics sit behind the panels.
- Do not use a plastic or foil accordion duct to replace a damaged one. It traps lint and is a fire hazard.
- Do not push the dryer hard against the wall. It can crush the duct and cut the airflow.
Signs the Cleaning Worked
You will notice it in the cycle times and in the clothes. A dryer with a clear filter, clean sensor bars and an open vent finishes loads in the time it used to, the drum and the clothes feel warm rather than scorching, and auto cycles stop when the laundry is dry rather than too early or late. If you time one ordinary load before you start and again afterward, the difference is usually clear.
If it does not improve, work backward through the list. A filter that is clean but still slow points to the duct. A duct that is clear but still slow points to the heater or its sensors, and that is the stage at which the codes appear. Two or three loads after cleaning is enough to tell whether you have fixed the problem or only moved on to the next one.
- Cycle time back to normal. The filter and duct were the cause.
- Auto dry ends at the right time. The sensor bars were the cause.
- Still damp or still coding. The cause is further along, and a technician should look.
A Cleaning Routine You Can Keep
The jobs are small, and they are easier when tied to something you already do. Lint every load, the filter wash and the sensor bars on the first of the month and the vent on the same date every year.
- Every load. Lint filter.
- Monthly. Filter wash and sensor bars.
- Yearly. Duct and vent hood.
If clothes are still damp after a full cycle once all of this is done, or a code returns, the cause is further along. A diagnostic visit for an LG appliance starts from $89, with the final price confirmed after diagnosis and a written estimate before any work begins. Our guide to LG dryer not heating covers the next step, and you can schedule a visit or read about LG dryer repair.